Sunshine Experimental Keyboard
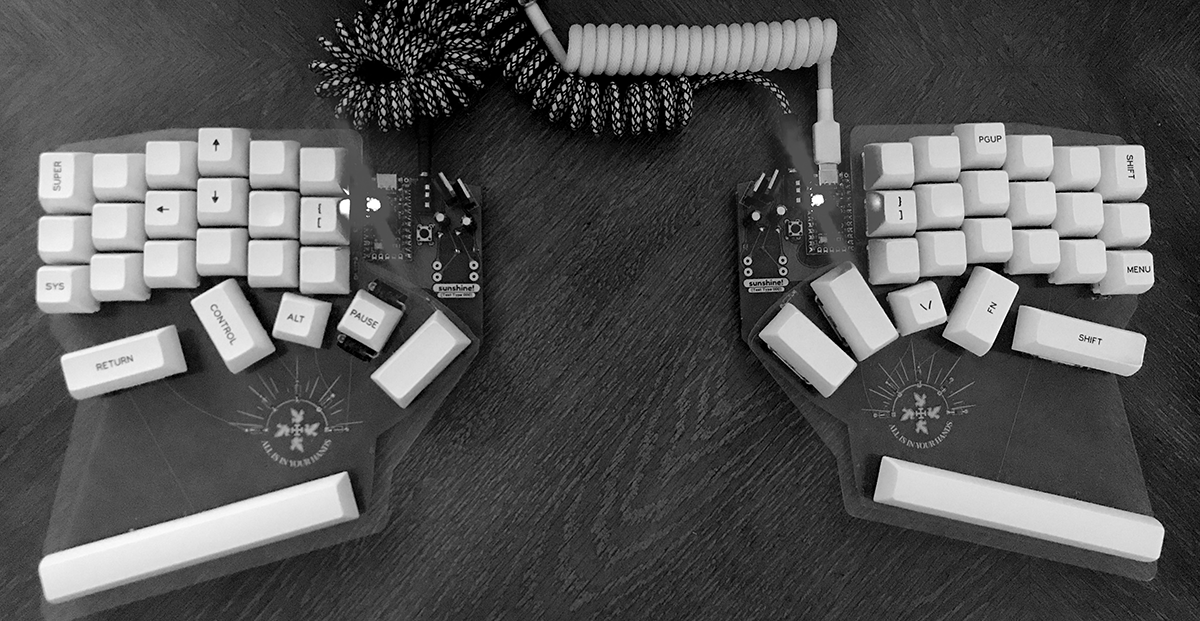
A unique and ergonomic column stagger split keyboard developed to comfortably utilize the entire hand by way of palm and wrist-rest keys. Also, up to four solenoids because I like loud noises (not pictured).
Feel free to use this table of contents to skim the sections you're interested in!
Abstract, a fancy term for T.L.D.R.
Using the most scuffed, path-of-least-resistance strategies, I developed the best keyboard ever. That's right, the best. Until I make the second version, I mean. Following is an overly-detailed explanation of everything I did and why I did it. Don't worry, there's pictures.
Background
I have always been interested in keyboards. When I was six, I meticulously dismantled my mother's non-functioning
Smith Corona SD 300 beyond any possible repair or reassembly.
Sorry, Mom, I just wanted to know how it worked...
As I grew up, I eventually learned about mechanical keyboards from the internet as we all do. Inevitably, I came across the hobby scene for it and bought a few kits to put together.
The Lily58 became my first ever split keyboard, and I loved it. After learning about circuits to discover how I had botched adding a rotary encoder I eventually moved on to Keeb.io's
Iris for double the amount of rotary encoders.
Despite my immediate love for ergonomic keyboards, I had a few problems with the ones I was using. While I have big hands, my fingers are proportionally rather short. The uppermost of the four rows on most split boards felt like a big waste of space to me; and my pinkies could not reach the second uppermost row without moving my whole hand for them, let alone the second uppermost row in the outermost columns.
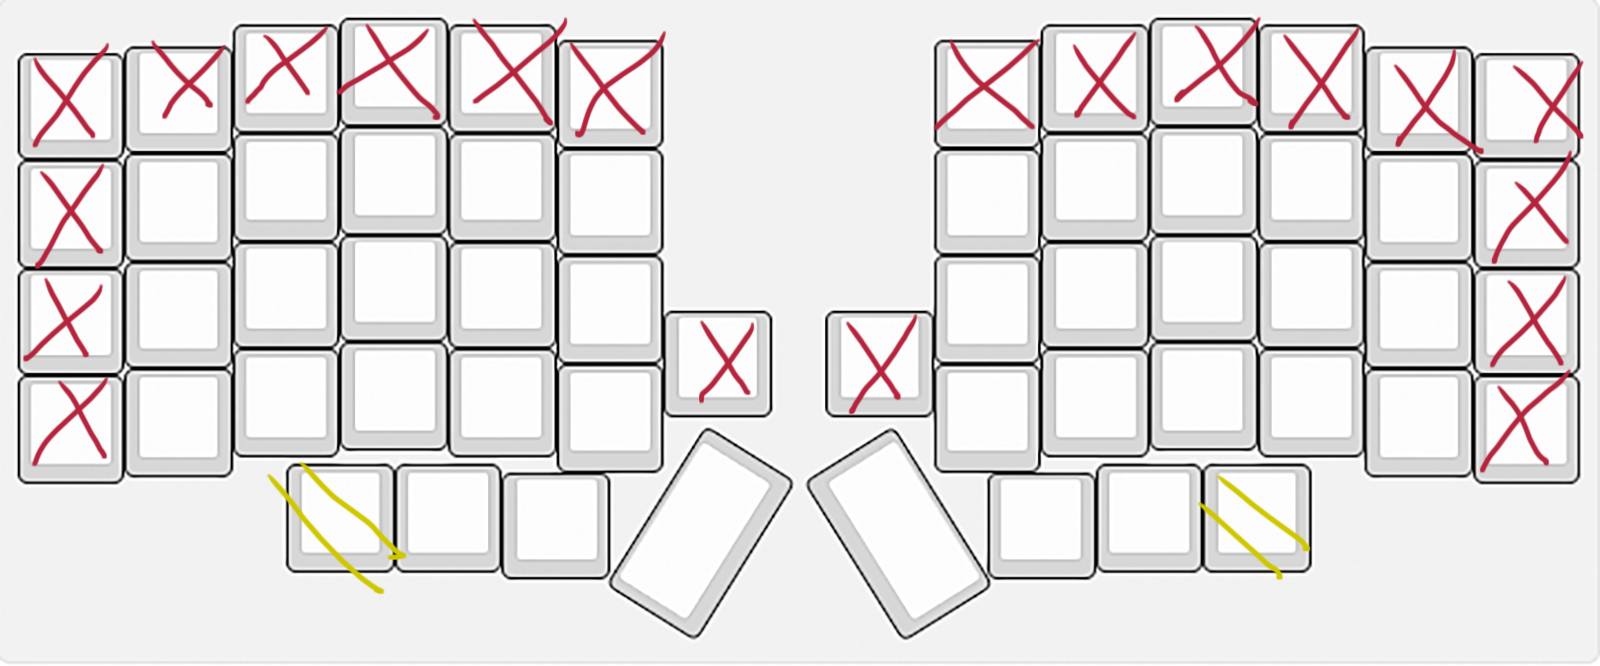
This meant there were twenty-two unusable keys on the Lily, and twenty on the Iris, but only because it was missing two of those unusable keys in the first place.
Additionally, while I loved the knobs on the Iris, I missed having four thumb keys like on the Lily.
—Except that fourth thumb key on the Lily was somewhat uncomfortable to reach.—
There needed to be a different way to lay them out. Although I saw keyboards like the Ergodox had multiple rows of thumb keys, I didn't like the idea. It seemed inelegant and just as hard to reach. The Kyria seemed to have a better way of handling it.
What's more, I needed some sort of wrist-rest to keep my wrists straight due to the height of the keyboards. I had seen some people solve this with weird squishy memory foam things, and others by switching from Cherry MX to Kailh Choc and having no case for the pcb.
I had a different idea, however, that would allow me to offset my hands exactly as much as I needed for key switches, without losing the 4mm travel distance afforded by MX switches. As I used keyboards, observed strategies employed by others, and read writeups about design rationales, I would begin to think about what an ideal keyboard might look like for me.
Objectives and Considerations
As my keyboard experiences deepened and widened and I came to learn what I liked and disliked, I started to adopt a few notions of what I wanted to consider in designing my keyboard.
My "theories" on design.
Phalanges aren't the only useful part of the hand.
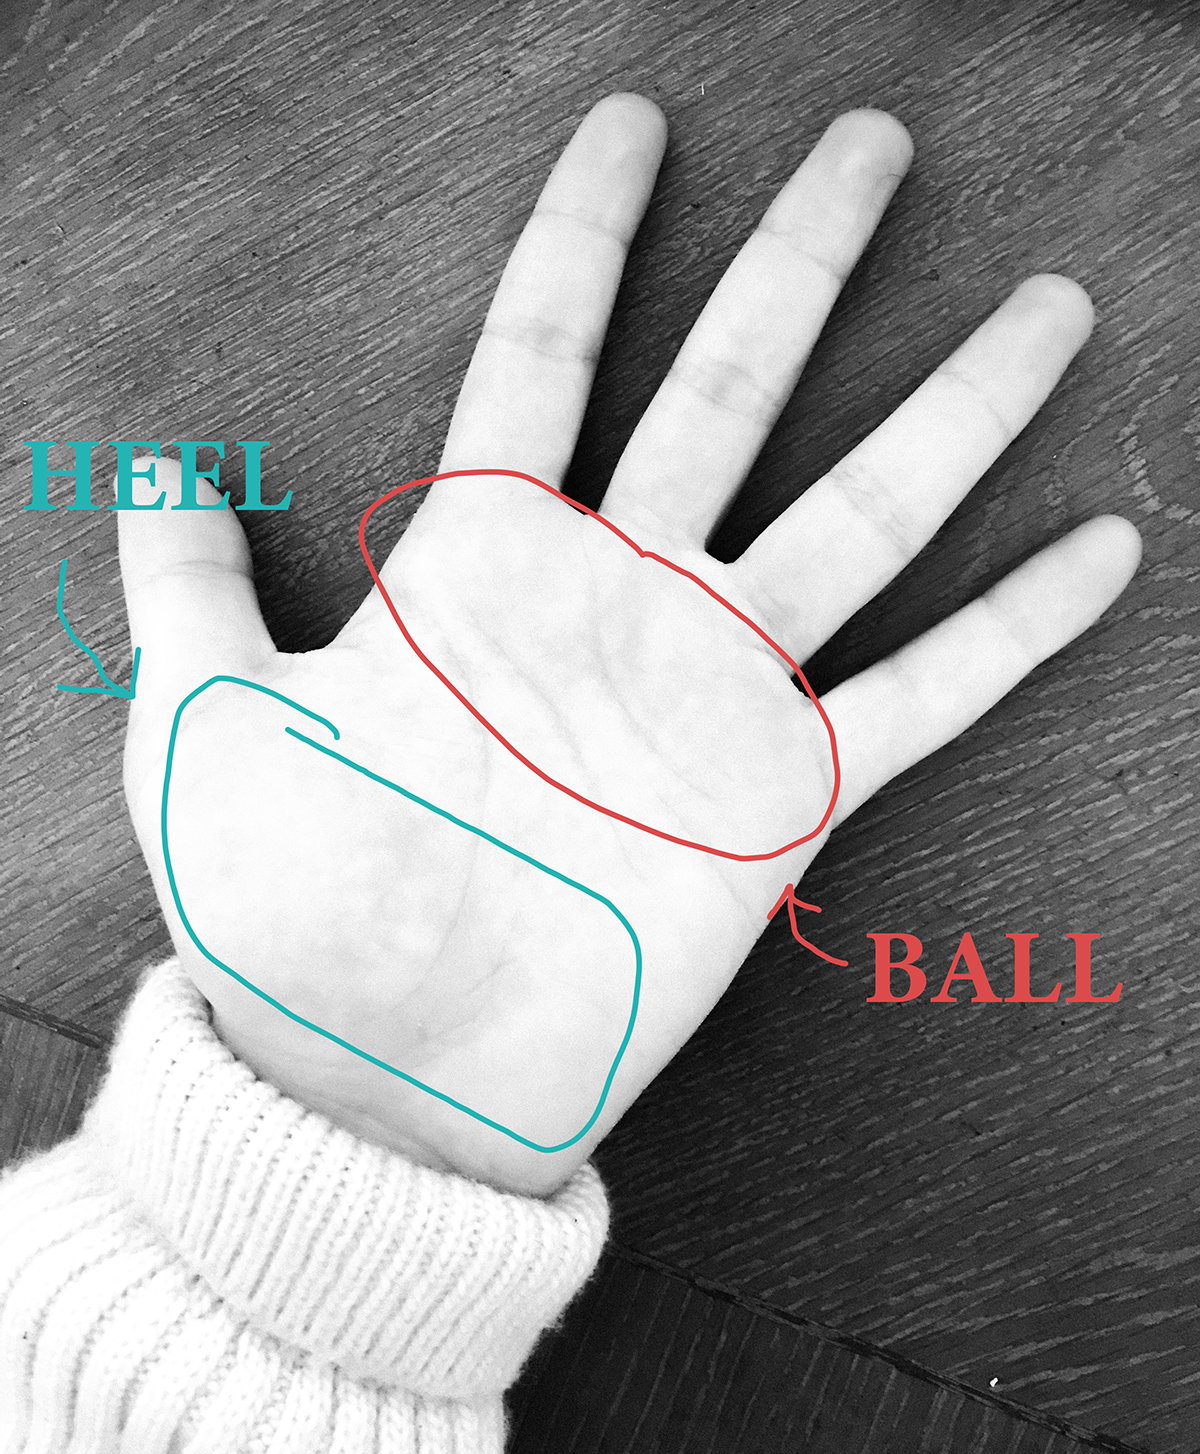
In anatomy, the muscles at the end of the metatarsals form a landmark known as the 'ball' of the foot. There is a similar landmark on the hands at the end of the metacarpals that I will refer to as the ball of the hand because I don't know anything about anatomy and have no idea if there is a proper name for it.
If you know what it's called, please tell me.
Equally, I will refer to the landmark at the bottom of the palm containing the carpals as the heel. Thankfully this at least seems to be accepted terminology.
It is my belief that these two landmarks are underutilized when it comes to keyboards, especially when the position of the heel itself is highly important to achieving a straight wrist to avoid pain. With the appropriate layout, these can be used to grant at least four more keys.
Keyboards need to assist easy access to combinations.
This means designing to enable myself to avoid combinations involving the pinkies and allow for combos without moving my hands. The best way I can explain this is to break continuity in the story and explain it using the finished product.
The shortcut keys on the Sunshine are laid out in a very specific way. That is because sometime you need to press say,
CTRL + ALT + Z
On other layouts, you might use your pinky for CTRL your ring finger for Z and your thumb for ALT. On the Sunshine, you just put your thumb between CTRL and ALT and push both at once. Your hand doesn't have to move and your pinky can hit Z.
For the very common shortcuts that include
CTRL + SHIFT
The heel key takes care of that.
Thus, I had formed a laundry list of features I wanted, combining pet concepts and accomodations for myself.
These were now my objectives for my design:
- More thumb keys. These are perfect for keys used often on their own or in combination with others like SPACE CTRL ALT or GUI.
- Wrist-rest that also serves as an input.
- Key that takes advantage of the outer "ball" of the hand at the fourth and fifth metacarpals.
- Split, duh.
- Columnar stagger that accommodates my hands, high stagger on the pinkies in particular.
- A unique look that stands out from the myriad similar projects.
- Low spring weight so I can try stenotyping. (This would have interesting pitfalls.)
Creating the perfect keyboard, the easy way
Design began properly some time around March 11, 2022 after I returned to the United States from a long trip to Ireland. Though I had been experimenting with Keyboard Layout Editor throughout my trip and prior, I had finally come up with a design (which borrowed heavily from the aforementioned SplitKB Kyria) I liked. It did away with some of the less accessible looking keys from the Kyria, and increased the stagger on the outermost columns. I added keys for the parts of the hand I thought deserved them, and that was that.
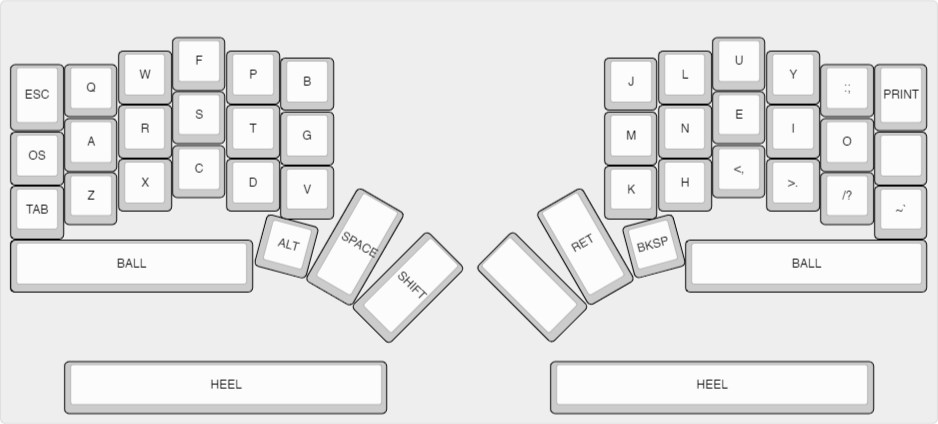
I think this one is the best looking, but least usable. My palms are too long. Note the 1.25U keys in the outermost pinky columns. It's supposed to keep things looking nice
Cardboard Aided Design
In order to rapidly prototype my designs I decided to put the layout into cardboard. I used Keeb.io's plate generator to generate a svg I could print as a paper template.
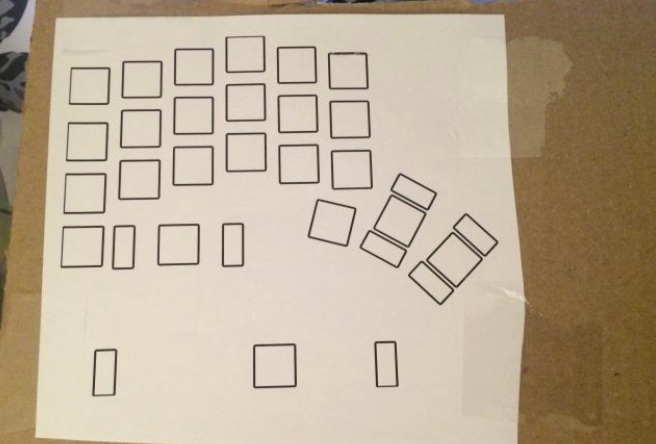
I would then take the template and tape it down to the cardboard and cut from each of the four corners inwards, supporting around the underside of the cut using a wheel of packing tape. By no means is this good enough for a permanent hand-wire build, but it works enough to test the layout.
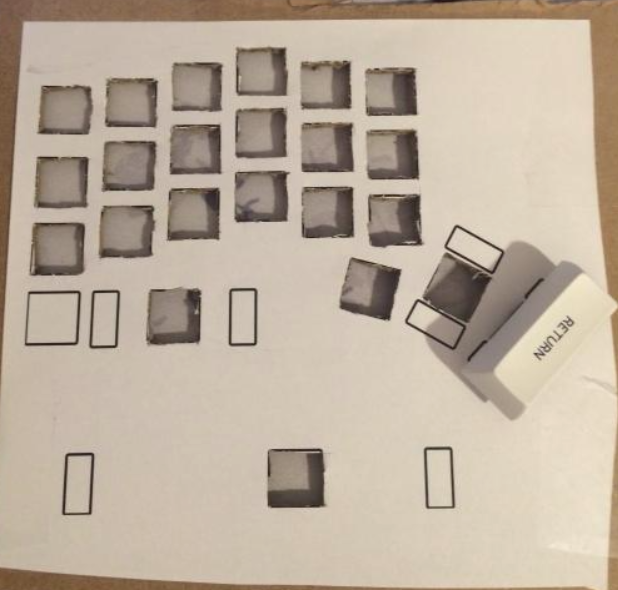
Once twenty two small squares were cut out, I could place the keys down. Here is where I realized the BALL key could not be such a strange size, and I would have to settle for a 2.75u key. This was for the best, as that let me fit the fourth thumb key.
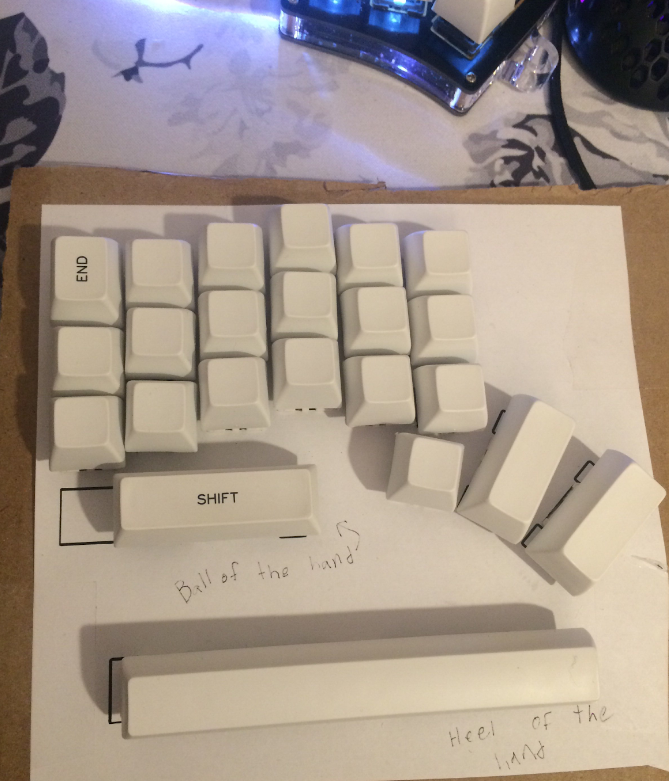
But yeah, all that work just to find out it wasn't really that comfortable. I could have just measured my hand... No big loss, though, it was just cardboard and a few minutes.
Finalizing the Design, or why I have hundreds of 13.97mm squares of cardboard.
Long story short, I went through a lot of different iterations on cardboard. Most important to note is that I was attempting to try to move the HEEL bar around in really small adjustments and then cut out new boards every time.
I would print them out, cut them out, and bring them to my mom to test if it was comfy every time. This started to add up in how much time it took. This design pictured here shows the original attempt at a method for pressing CTRL and ALT at the same time.
.png)
I figured out, thankfully, I could just cut off the bar and move it to where it was comfy and then measure with my calipers where it ended up.

Eventually, I was happy with the design and the positioning of the thumb cluster and the HEEL bar.
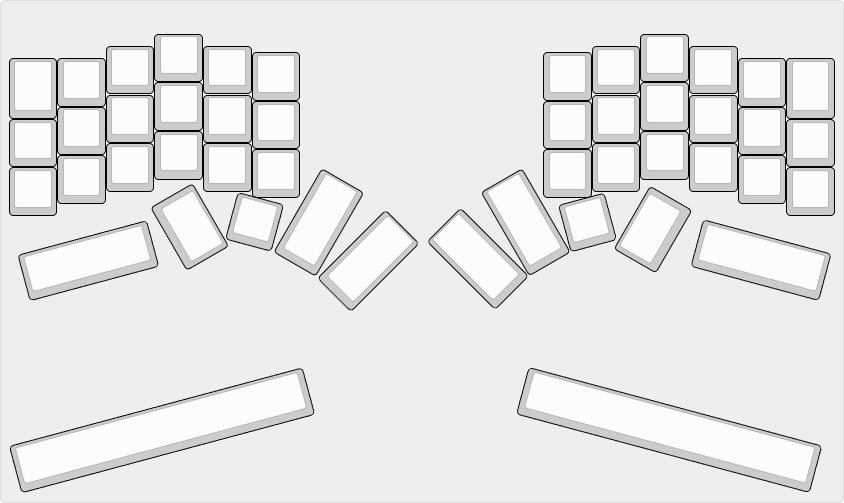
I would go on to export a dxf from keeb.io's plate generator and import it into fusion, then cut it out on my mill. In cardboard.
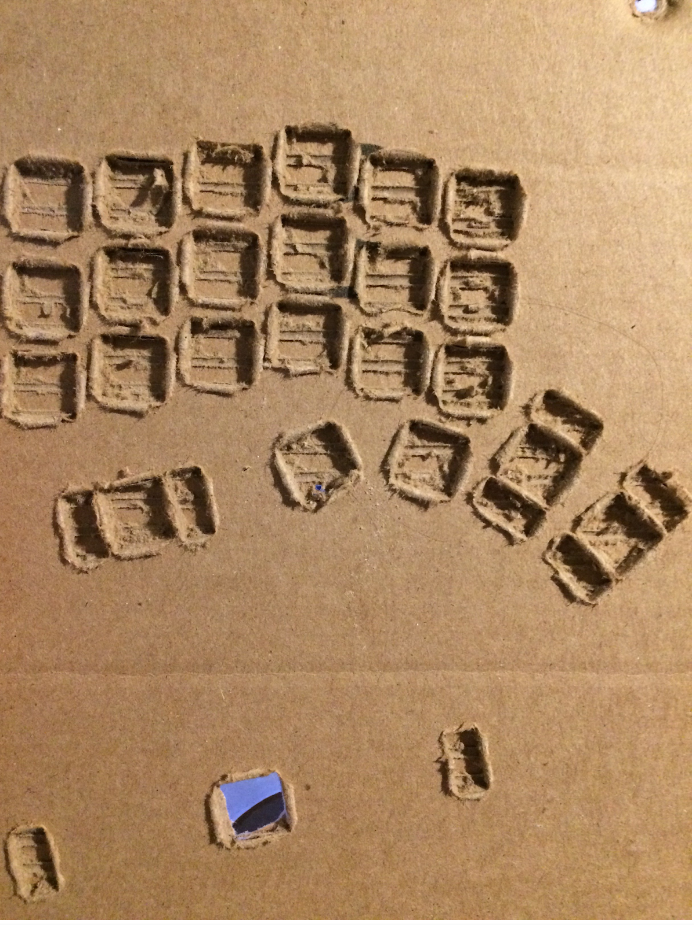
I attempted to leave an onionskin, since I didn't have a wasteboard underneath and on the first hole I accidentially milled into the bed. Which meant cutting out more squares by hand.
I was happy with that, and went on to cut two plates out of polycarbonate, then came designing the pcb.
Adventures in PCB design.
Prior to the Sunshine, I had designed only one PCB ever before. While I had a strip of a few RP2040s, I wanted the ability to use QMK because I had experience with it and at the time there wasn't support for the 2040. I instead used an Elite-C because I wanted the ATMega32u4, and those are currently either stupidly expensive or out of stock everywhere.
After watching a very convincing video by Mitxela on curved traces I resolved to abandon the 45 degree defaults in KiCad.
The PCBs, unlike most well-designed split keyboards, are not reversible because I wanted a certain look on the front and rear.
Here are some carefully curated photos that make my pcbs look really good and slightly out of focus. In full color, ruining my theme for this page.
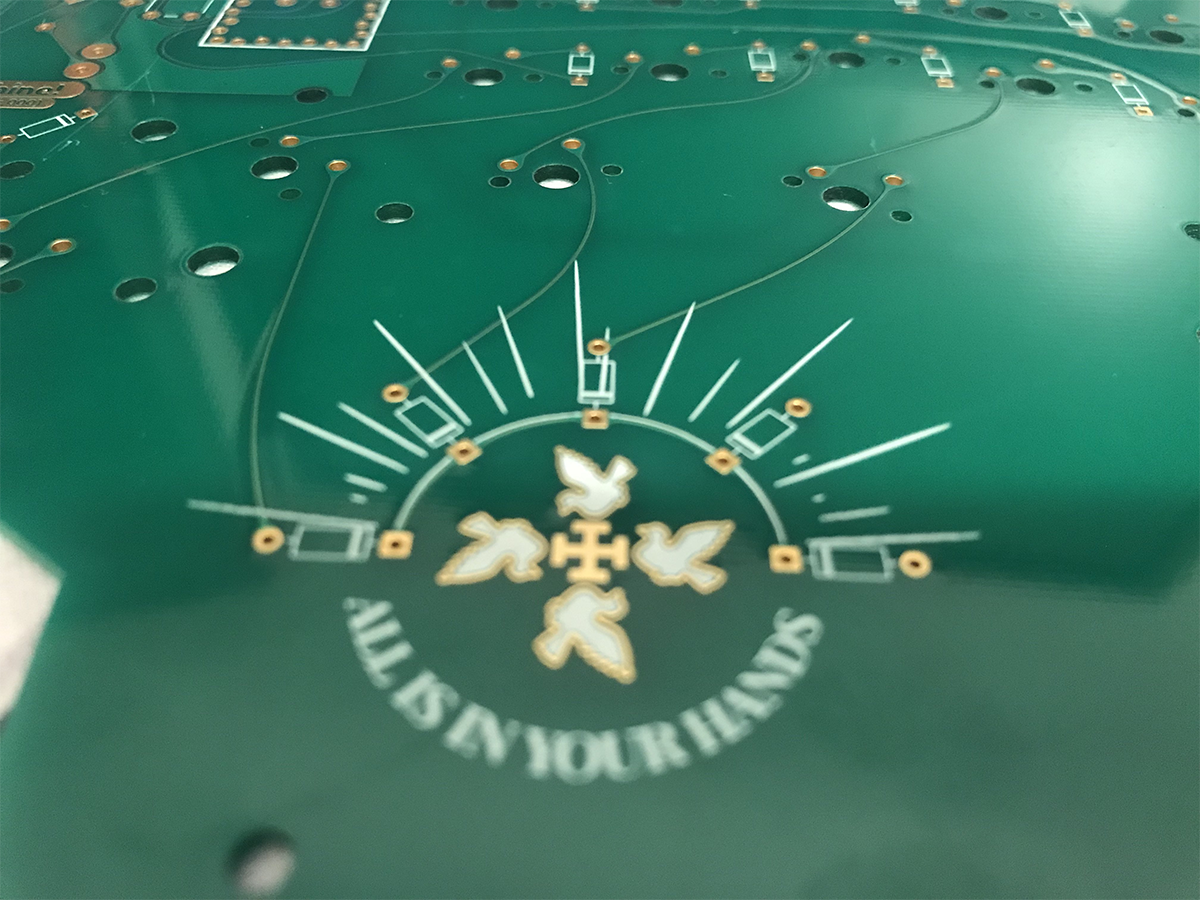
Really more like under your hands.
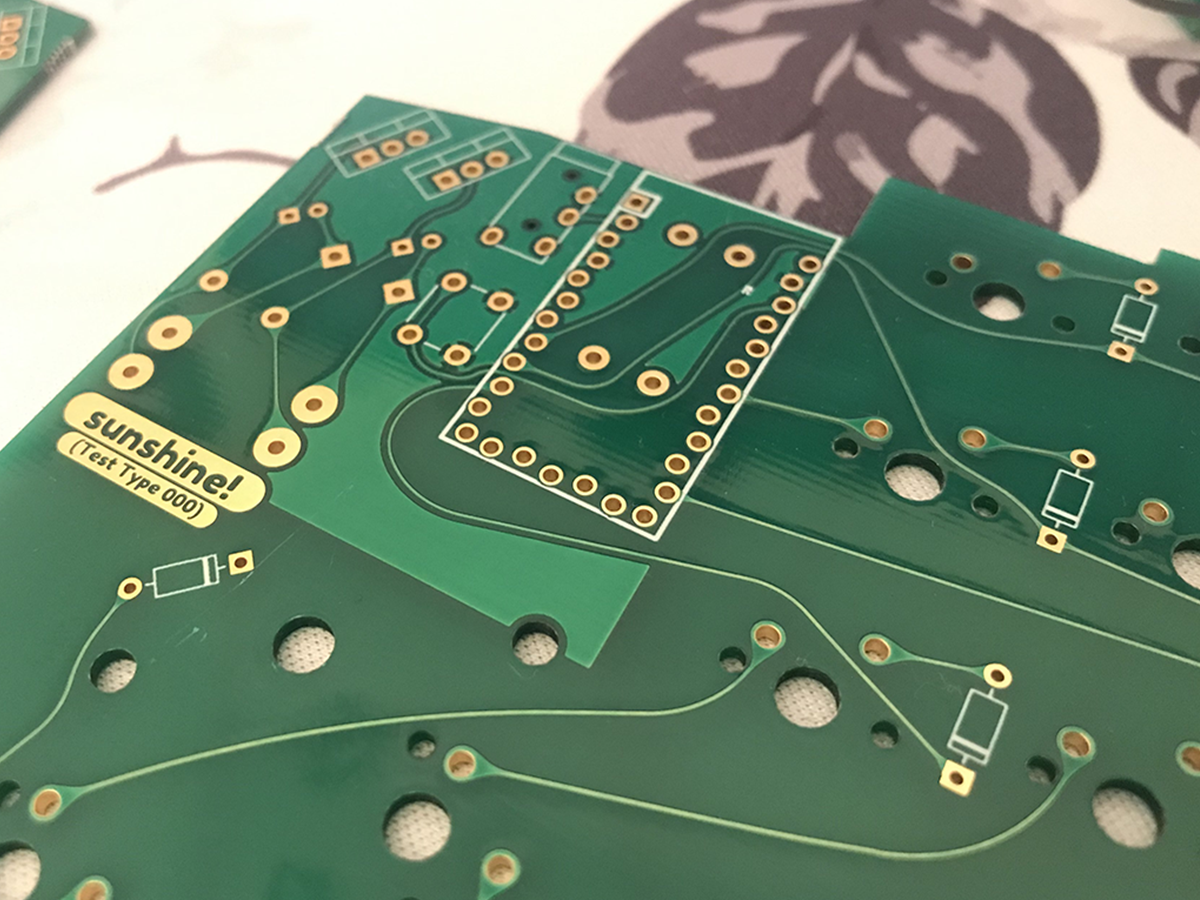
The place where all the big components go, the Elite-C, the solenoid circuit, TRRS jacks, and reset button.
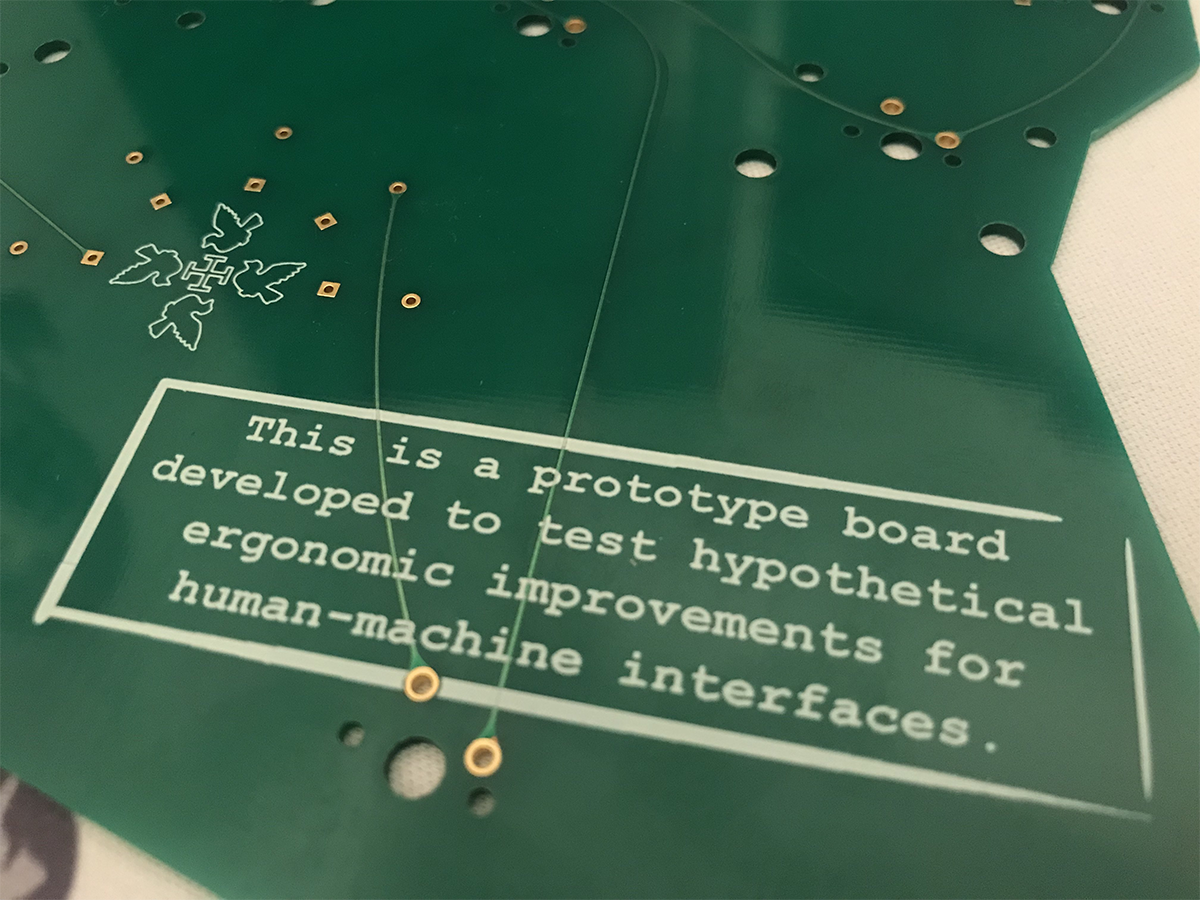
PRO-TIP: This silkscreen decal excuses my design from all shortcomings.
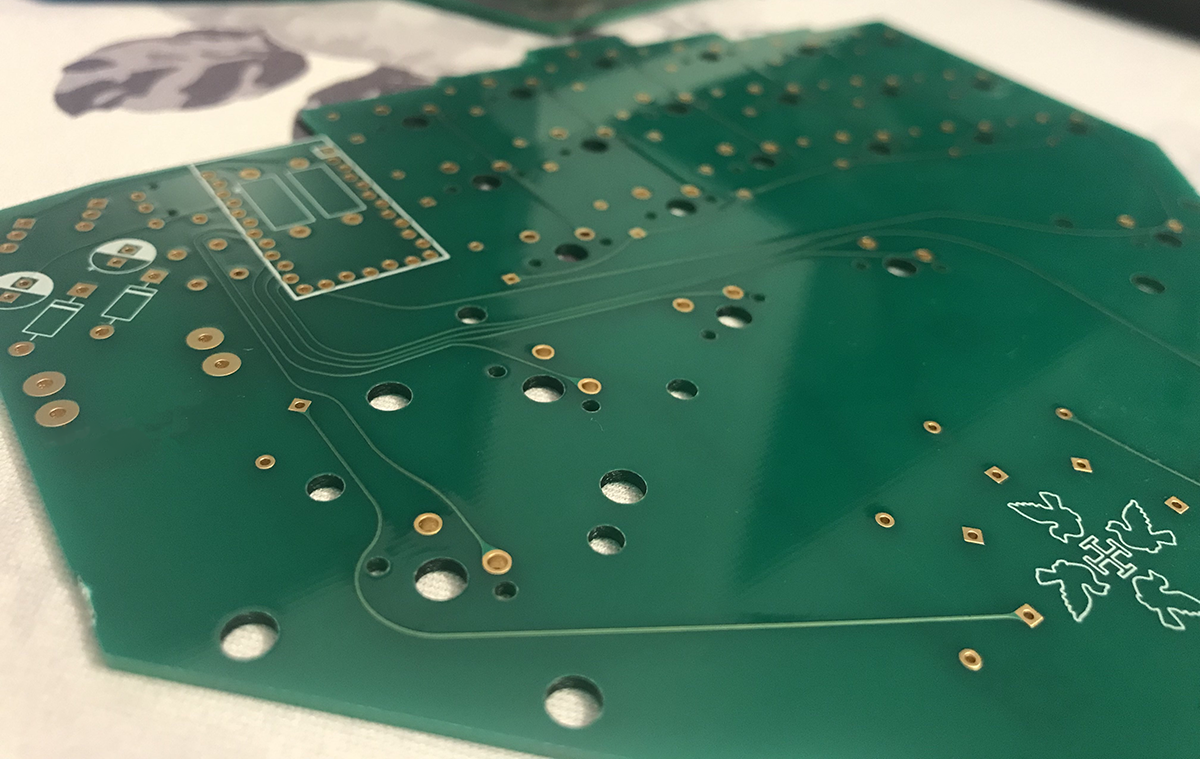
Back left side.
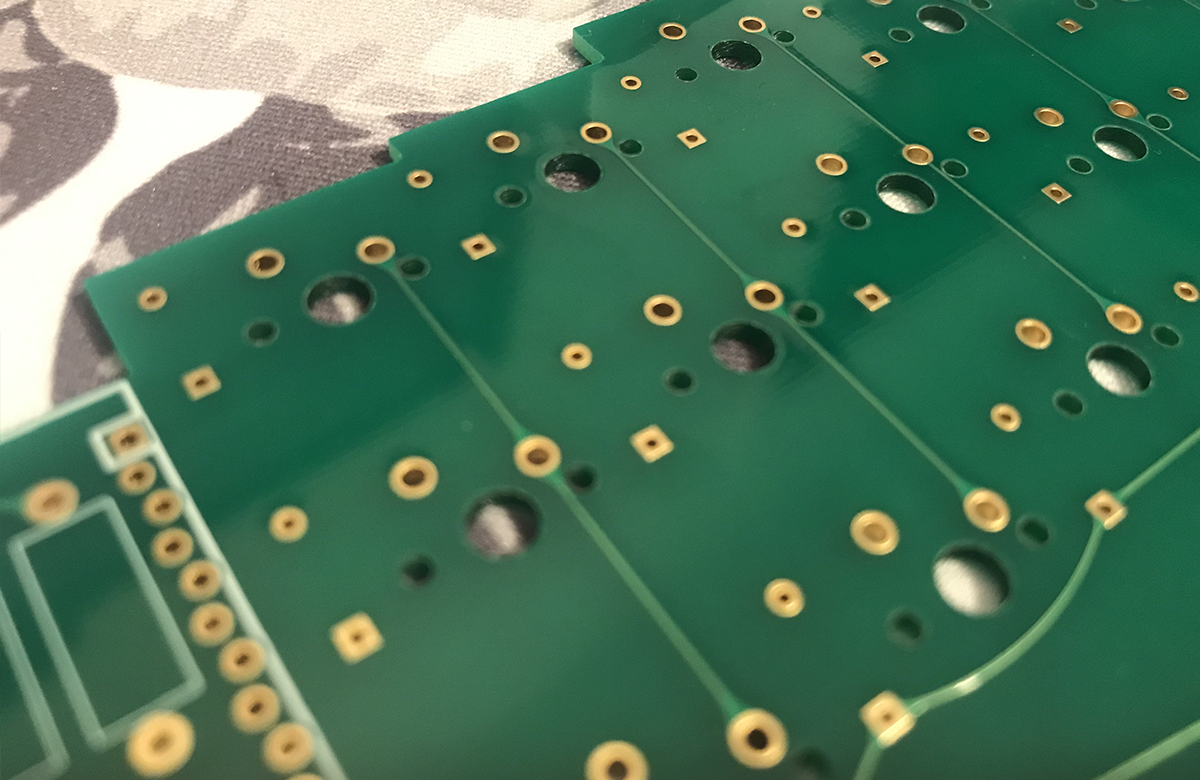
I really like how the key matrix came out.
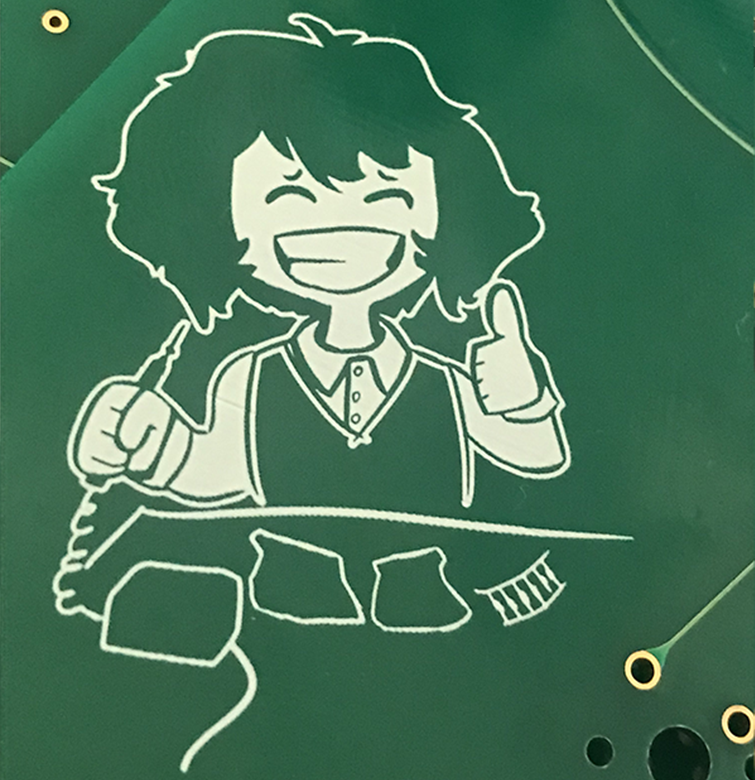
A friendly face to keep me company while soldering.
I won't be posting the PCB files themselves, not until the second version. I'm very proud but simultaneously self-conscious. I hope you like the photos.
My Keymap, and other personal adjustments
I'll skip the details about assembly, they're boring, it was easy. (Apart from arduously lubing switches and springs...) After it was assembled and sitting on my desk the Sunshine was everything I could have hoped. I set up VIAL and flashed the Elite-Cs with my keymap. My keymap is pretty simple, it's really easier to show it than to talk about it. Colemak-DH and some layers, nothing crazy. Most important notes are that I felt comfortable leaving keycodes intended for normie keyboards like =+ instead of separating them because of how easy it was to add SHIFT to any combination. The main personal adjustment I want to talk about is spring weight. My alphanumerics are all 25 gram, which is very light. 2U keys need to be heavier but I'm putting off desoldering them and making due. That's why my spacebar is using a 1U key. The HEEL bars, however are using awesomely heavy 650 gram springs. This makes them exceedingly comfortable as wrist-rests, but simultaneously possible to press down when needed. YMMV, not all wrists weigh the same. If I wasn't using heavy springs I would invert things in firmware so SHIFT would activate when the bars are no longer depressed.
Oh and I never use that second alt key. If you have ideas on what I should put instead, hmu pls.
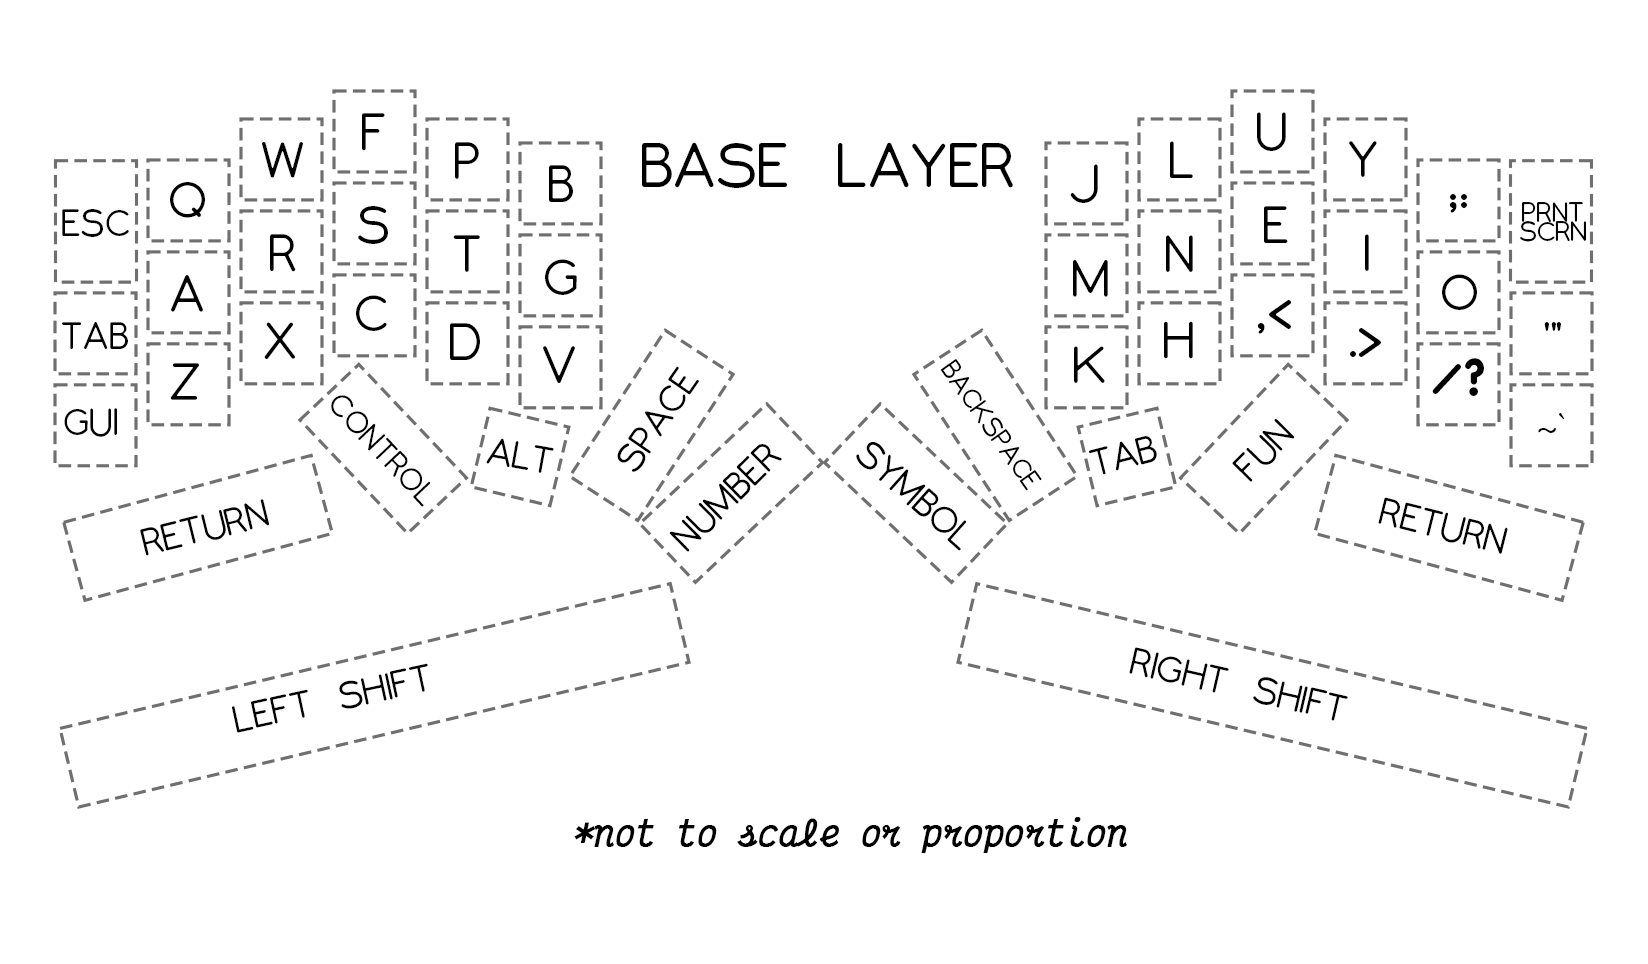
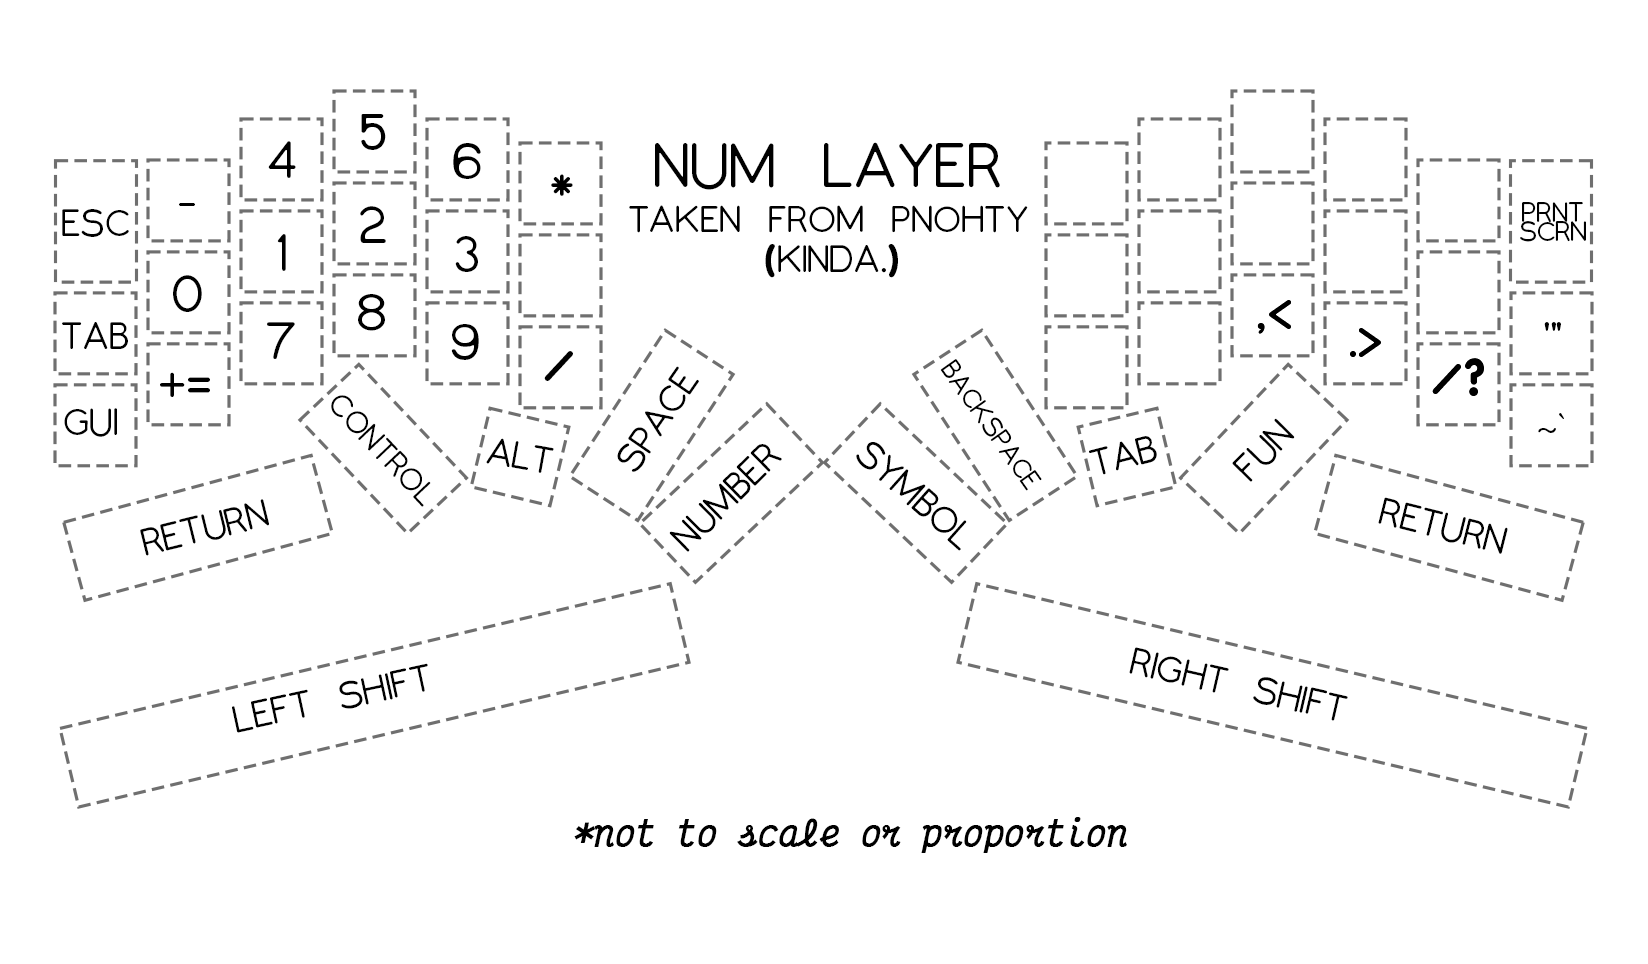
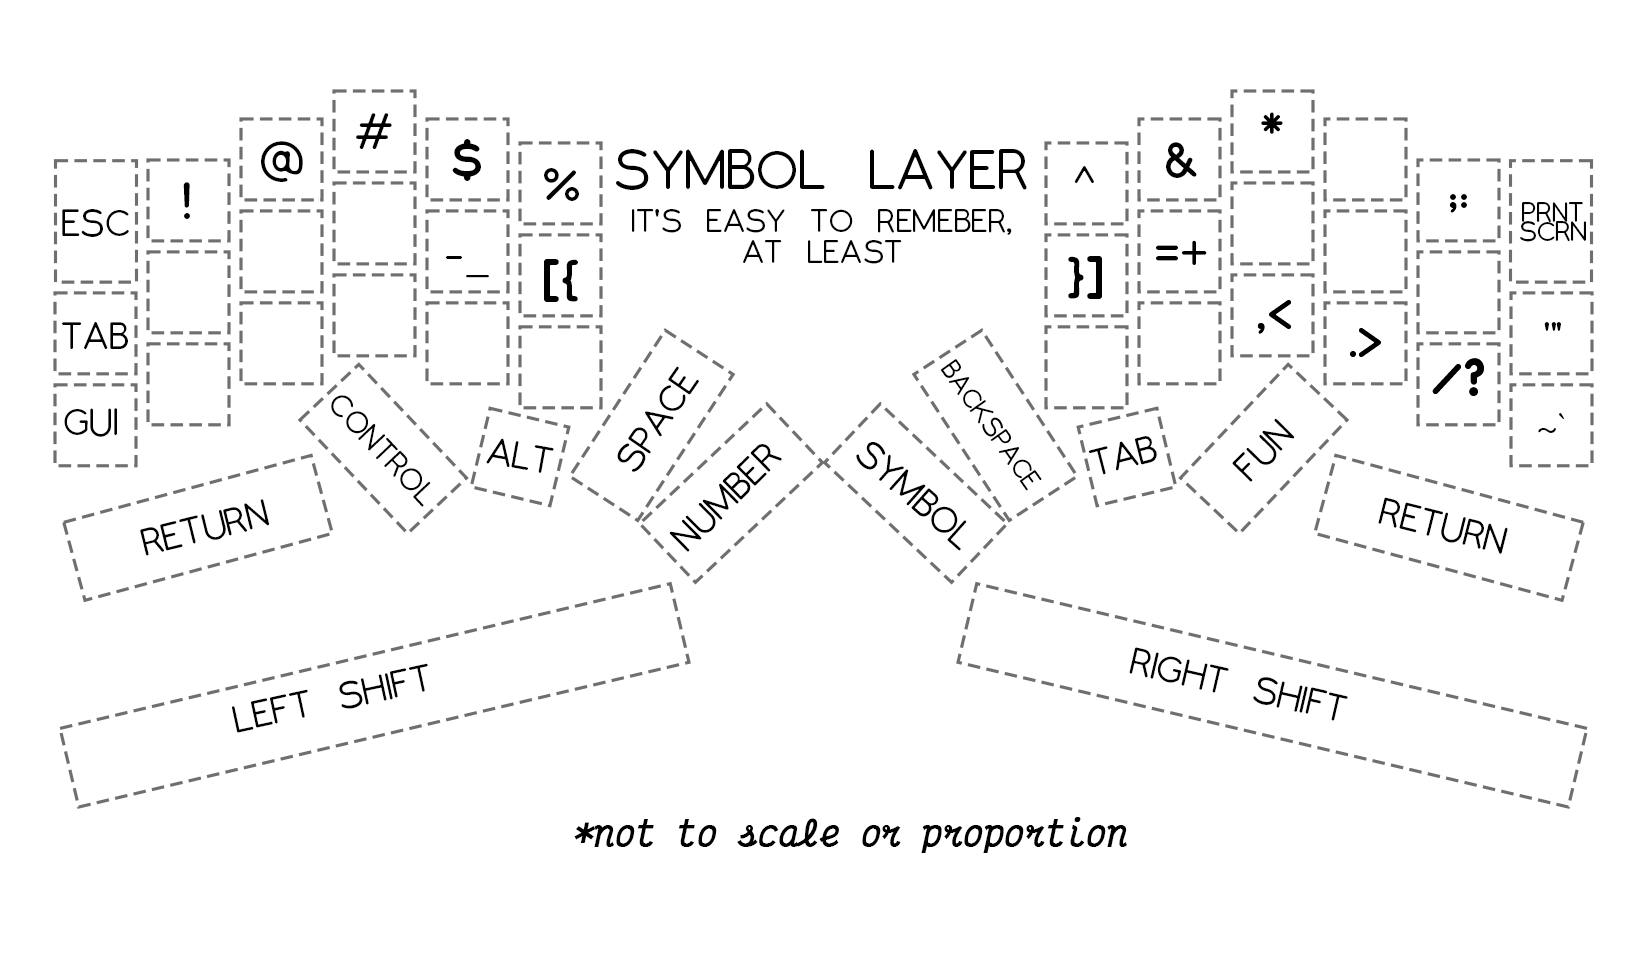
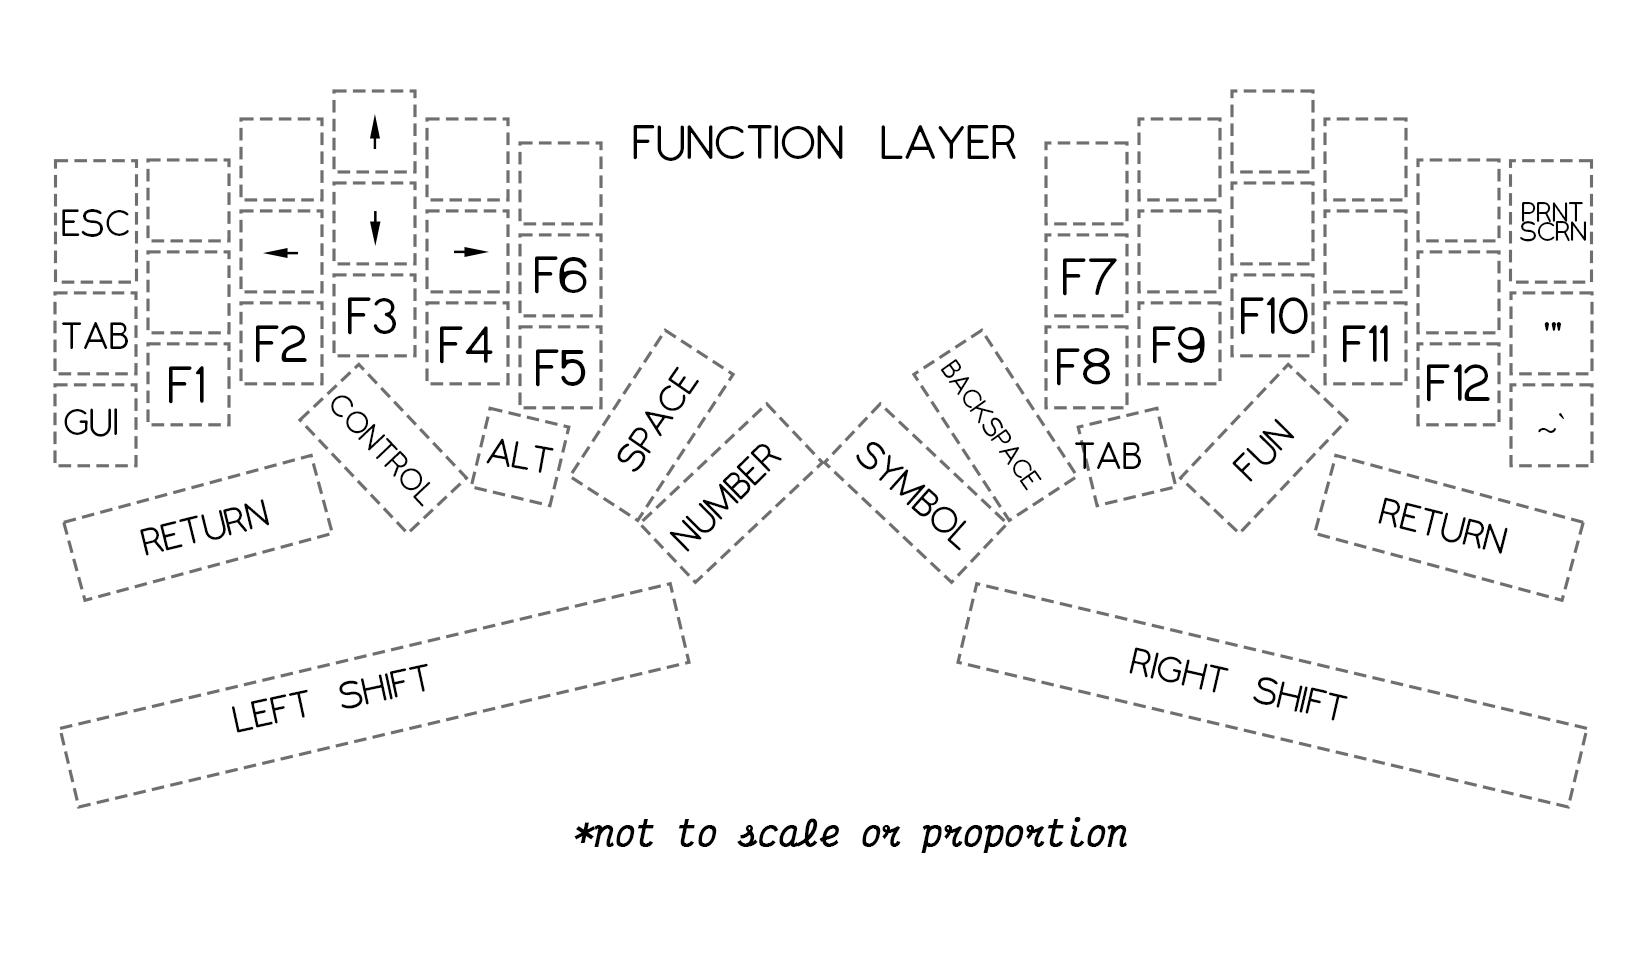
The things I found out along the way
Just as I discovered new likes and dislikes through experiencing and researching previous keyboards, using the Sunshine has lead me to learn new things too. These include:
- Going between pointing tools and the right side of the keyboard can make combinations harder.
- My pinkies STILL have a hard time reaching the highest row and the outermost columns. (Though not AS hard.)
- I miss the convenience of rotary encoders.
- Came across this keyboard by total chance. It has a thenar eminence key, could be a really cool input to add to the next Sunshine. Would require a big rework of the overall design but it could be done.
- The BALL key needs to be taller to reach the fourth and fifth metacarpals.
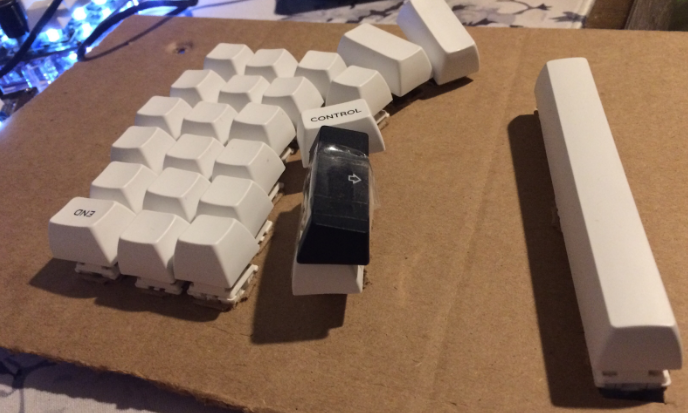
My attempt during cardboard prototyping to rectify the height issue. Impeccable elegance, of course.
My plans for the next version.
Adjusted and optimized layout
I think I will need to adjust the staggers again and go far more drastic. I may also investigate splay. While this might require a whole second round of cardboard prototyping, I have another method I'm eager to try. You'll hear about that next time. While the Kyria-esque layout serves me well, I think I want more stagger.
Feature creep
I want to add rotary encoders to the next build, at least one. They make pausing and playing media ultra convenient and volume adjust is super welcome too. However, there's more convenience to be had. For one, I love Guilty Gear, and sometimes I actually play Strive instead of listening to the albums while doing other things. I think a small 8-directional switch could be really nice to add if it could fit nicely. I doubt it would replace my fight stick, but it would still be really sweet. That aside, I need a pointing device of some sort, which an 8-directional switch is not suited for. An Oddball-esque arrangement would be really nice.
Production-ready, professional looking design
I want to be able to release plans for the second version gasket mounted in a case (maybe even sell it 🤔), I think a new version would benefit from the HEEL bars having a separate PCB, as there is massive wasted area on the PCB as it stands. What's more, I want to use the RP2040 on-board instead of using something like the Elite-C. There are obvious benefits to this, cost being one of them, but I want to do it because it's just more elegant. I also want to find a better way for handling the mosfets and capacitors for the solenoid circuit. They take up a lot of space. Lastly, I want to have cute full-board artwork and better routed traces. I had a lot of cool ideas based on my pothos plant I never implemented and I'd like to give those another go.
Until next time!
I hope you enjoyed hearing about the keyboard I made. Sorry if my writing is a bit stiff or awkward. I haven't read a book since last year. If you want to reach out to me, I'm on github at pelmeniboiler, discord at pelmeniboiler#8372, reddit at /u/pelmeniboiler and twitter at @pelmeniboiler.


.png)


